How to Smoke a Pork Shoulder on an Offset
The most forgiving large cut in barbecue, and the right second cook after ribs. Buy a bone-in Boston butt, run 250°F, ignore the clock and cook to feel — here is the method, the stall, and why the finish temperature has nothing to do with food safety.
Quick answer
Buy a bone-in Boston butt, 8–10 lb. Trim the fat cap to about ¼ inch, rub it, and run the smoker at a steady 250°F. Expect roughly 1½ to 2 hours per pound — but cook to feel, not the clock. It will stall around 150–170°F for hours; that is normal, and you either wait it out or wrap. Pull it when a probe slides in with no resistance, generally 195–205°F, then rest at least an hour before shredding. That window is about texture, not safety — the USDA’s safe minimum for pork is 145°F.
Why pork shoulder is the cook to do second
Ribs first, pork shoulder second, brisket last. That order is not tradition; it is about how much a cut punishes mistakes.
A pork shoulder is a heavily worked muscle laced with fat and collagen, and both of those are insurance. Run it fifteen degrees hot for an hour and the fat keeps it moist. Overshoot the finish temperature and it gets softer, not drier. Stall for four hours and nothing is harmed. A brisket flat, by contrast, is lean and will go from perfect to ruined in forty minutes, which is why it has a reputation and why we tell people to leave it until they can hold a line.
So pork shoulder is the cut on which you learn fire management over a long cook— which is the actual skill an offset demands — without the cut itself adding risk. If you have not run a long cook on your pit yet, read how to use an offset smoker first; this page assumes you can hold 250°F.
Butt or picnic? Bone-in or boneless?
“Pork shoulder” covers two different cuts and the difference matters.
The Boston butt (also sold as pork butt) is the upper shoulder. It is well marbled, roughly rectangular, and it is what you want. The picnic shoulder is the lower section: more skin, more sinew, less even marbling, and more work to clean up. It can be excellent but it is not a first-attempt cut.
Bone-in, every time.Three reasons. The blade bone conducts heat into the center, so the cook is more even. The bone sliding out clean is one of the most reliable doneness cues in barbecue — a tactile check that needs no instrument. And boneless shoulders are usually netted, which means the piece has been rolled and tied, so the surface that should be forming bark is folded inside.
Size:8–10 lb is the sweet spot. Smaller than about 6 lb and it can dry at the edges before the collagen renders. Much larger and you are adding hours for no benefit; two 8 lb butts side by side beat one 16 lb monster.
Temperature: the part most guides get wrong
There are two completely separate temperature questions here and conflating them confuses people badly.
Food safety. The USDA publishes a safe minimum internal temperature for pork of 145°F with a three-minute rest. Your shoulder passes that point in the first few hours and is, from a safety perspective, finished. The USDA also publishes the point that matters more for barbecue generally: color is not a reliable doneness test, a thermometer is. Both citations are at the foot of this page.
Texture.You keep cooking for another six or eight hours for a completely different reason: collagen. Collagen is the connective tissue that makes a working muscle tough, and it only converts to gelatin with prolonged heat well above the safe minimum. That conversion is what turns a shoulder from “cooked pork roast” into something that falls apart. It happens broadly in the 195–205°F range.
Which is why the real test is feel, not a number. Probe the thickest part in several places; when the probe meets no resistance anywhere, the collagen has gone. One shoulder gets there at 198°F and the next at 205°F, and both are correct. Pulling at a number because the number arrived is the most common way to produce pulled pork that needs a knife.
The stall, and whether to wrap
At some point between 150°F and 170°F the internal temperature will simply stop climbing. It can sit there for three or four hours. Every first-timer assumes the fire has died.
It has not. The meat is sweating, and evaporation from the surface is removing heat at almost exactly the rate the fire is adding it. It is a wet-bulb effect, and it ends on its own once enough surface moisture has gone.
You have two legitimate options.
- Wait.Do nothing. You get the best bark this way — a dark, firm, properly set crust. It costs you hours, which is why experienced cooks start pork shoulders the night before.
- Wrap— the “Texas crutch.” Wrap tightly in foil or butcher paper at the stall. That stops evaporation, so the temperature climbs steadily again and you cut the remaining time roughly in half. The cost is bark: foil traps steam and softens the crust you have spent six hours building. Butcher paper is the compromise — it breathes slightly, so you keep more bark and still beat the stall.
Neither is wrong. If you are cooking to a serving time, wrap. If you are cooking for the best possible result and have the hours, do not.
What you need to do this properly
A pork shoulder is a 10-to-16-hour commitment, most of it unattended, and three pieces of kit decide whether that is relaxing or miserable.
A multi-probe thermometer is not optional on a cook this long. The lid dial on an offset measures air at the top of the dome, not the grate where the food is, and the gap between them can be thirty degrees on thin steel. You need one probe at grate level and one in the meat, with an alarm, so you can sleep through the stall instead of standing next to it.
Leather gauntlet gloves, because over twelve hours you will open the fire door twenty times, reposition burning splits and rake a coal bed with your forearm inside the heat. Coated fabric gloves get holes burned in them doing this; leather does not. Note that you want a second, food-safe pair for handling the meat — leather that has absorbed rendered fat should never touch food again.
And wood. Pork shoulder is the cut that takes assertive smoke best: hickory is the classic pairing and is hard to overdo on pork specifically, where it would overwhelm chicken or fish. Use chunks or small splits, never chips.
How this is funded: we earn a commission if you buy through our links, at no extra cost to you. It never changes which product we recommend, and we’ll tell you when we’d skip one, or point you to a cheaper option when it’s the better buy. Full disclosure.
Three things to have before you start a 12-hour cook
Live prices from our daily refresh. The thermometer is the one that genuinely decides whether an overnight cook is restful or not — everything else on this list is comfort and fuel.
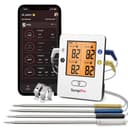
ThermoPro TP25 4-Probe Bluetooth Thermometer
Four probes and a phone alarm — one at grate level, the rest in the meat — so you can sleep through the stall instead of watching it.
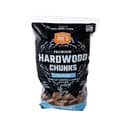
Oklahoma Joe's Hickory Wood Chunks (432 cu in)
Assertive hickory chunks, 432 cu in — the classic pork shoulder pairing, and the one species that is hard to overdo on this cut.
Price as of October 13, 2026. #ad How we’re funded
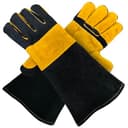
Grill Armor 16-inch Leather Fire Pit Gloves
16-inch leather gauntlets, maker-rated to 932°F, for the twenty times you will move burning splits over a long cook.
Price as of October 13, 2026. #ad How we’re funded
Timing, honestly
Roughly 1½ to 2 hours per pound at 250°F, so an 8 lb butt is a 12-to-16-hour planning window. We are giving you a range rather than a figure because the stall makes any single number useless — two identical shoulders on the same pit can finish three hours apart.
The practical consequence: never plan to finish just before you want to eat. Aim to be done two or three hours early. A finished shoulder holds beautifully — wrapped, in a dry cooler, it stays serving-hot for hours and the extended rest genuinely improves it. A shoulder that is not ready when people are hungry cannot be hurried without wrecking it.
Resting is part of the cook
Minimum one hour, ideally two or three. Wrap loosely and leave it somewhere insulated.
During the cook, rendered fat and juices are driven toward the cooler center and the muscle fibers are contracted. Resting lets both relax and redistribute. Shred a shoulder straight off the pit and a visible volume of liquid runs out onto the board, and that liquid is the difference between succulent and merely soft.
When you pull it: the blade bone should lift out clean with almost no effort. If it resists, the shoulder needed longer — which is useful information for next time, and not a disaster now. Shred with forks or gloved hands, discard the hard unrendered fat, and mix the darker bark pieces back through so the flavor is distributed rather than concentrated in a layer.
Where to go next
If this is your first long cook, do ribs first — how to smoke ribs is a five-hour commitment that teaches the same fire management with less waiting. If you have done both and want the hard one, how to smoke a brisket is the next step and the stall section there matters even more.
If you do not own an offset yet and this is what you want to be doing, best offset smokers for beginners ranks pits on how forgiving they are rather than on price, and what you need for an offset smoker is the full kit list in priority order. Running one on a kettle instead is entirely possible — see the snake method, though a shoulder will usually need one fuel top-up on a kettle.
Frequently asked questions
What temperature do you smoke a pork shoulder to?
Pull it when a probe slides into the thickest part with no resistance, which is generally between 195 and 205°F. That window is about texture, not safety: collagen only converts to gelatin with prolonged heat well above the safe minimum, and that conversion is what makes the meat shreddable. The USDA's safe minimum internal temperature for pork is 145°F with a three-minute rest, which your shoulder passes in the first few hours. Cook to feel rather than to a number — one shoulder is ready at 198°F and the next at 205°F.
How long does it take to smoke a pork shoulder?
Roughly 1.5 to 2 hours per pound at 250°F, so an 8 lb Boston butt is a 12-to-16-hour planning window. We give a range rather than a figure because the stall makes any single number useless — two identical shoulders on the same pit can finish three hours apart. Plan to be done two or three hours early: a finished shoulder holds serving-hot for hours wrapped in a dry cooler, and the extra rest improves it.
What is the stall and should I wrap?
Somewhere between 150 and 170°F the internal temperature stops rising, sometimes for three or four hours. That is evaporative cooling — the meat is sweating, and evaporation removes heat about as fast as the fire adds it. Your fire is fine. You can wait it out, which gives the best bark, or wrap tightly in foil or butcher paper to stop the evaporation and roughly halve the remaining time. Wrapping costs you bark crispness; butcher paper is the compromise because it breathes slightly.
Boston butt or picnic shoulder for pulled pork?
Boston butt, which is the upper shoulder — well marbled, roughly rectangular and far more forgiving. The picnic shoulder is the lower section with more skin and sinew and less even marbling; it can be excellent but it is not a first-attempt cut. Buy bone-in at 8 to 10 lb: the blade bone conducts heat into the center for a more even cook, and the bone sliding out clean is one of the most reliable doneness cues there is.
Fat side up or down on a pork shoulder?
Fat side up on an offset, where the heat arrives from the side rather than from directly below. The common claim that the fat cap bastes the meat is not really true — rendering fat runs down the outside, not inward through muscle — but a cap on top does shield the surface from the hottest airflow. Trim it to about a quarter inch either way: leaving it thick mostly blocks smoke and rub from reaching the meat.
What wood is best for pulled pork?
Hickory is the classic pairing and pork shoulder is the cut that takes assertive smoke best — hickory would overwhelm chicken or fish but suits pork almost perfectly, and it is genuinely hard to overdo on this cut. Oak is the safer all-rounder if you want something more restrained, and apple or cherry give a milder, sweeter result. Use chunks or small splits and add them only in the first four hours; chips flash off in minutes and achieve nothing on a cook this long.
Sources
- USDA FSIS — Safe Minimum Internal Temperature Chart — The USDA's official safe minimum internal cooking temperatures for beef, poultry, pork and more (accessed July 22, 2026)
- USDA FSIS — Doneness Versus Safety — USDA on why color is not a reliable doneness test and a thermometer is (accessed July 22, 2026)
- USDA FSIS — Grilling Food Safely — USDA guidance on safe grilling, thermometer use and avoiding cross-contamination (accessed July 22, 2026)
Keep reading
Meat Smoking Temperature Chart
Every cut's USDA safe minimum and its much higher barbecue finish temperature, in one chart with smoker temps and timings.
Read the guide →How to Smoke Ribs on an Offset
Trim, rub and run 250°F to clean-biting ribs — the shorter cook to do before this one.
Read the guide →How to Smoke a Brisket on an Offset
Trim, season, ride the stall and wrap — the hard cook, and the one to leave until last.
Read the guide →What You Need for an Offset Smoker
The short list of kit that turns a new offset into a working smoker — and the long list you can safely skip.
Read the guide →